
Ever finished a garment and felt like the waist is sitting too low, the skirt is a little too long, or the proportions just feel off? Yeah same! (I'm 5'3" so most things are too long on me!)
It’s such a common experience and it’s not because your body is wrong.
Most sewing patterns are drafted for around 165cm (5'5"), which means shortening is often the key to getting that perfect fit.
The great part is once you learn how to shorten a pattern properly, it becomes one of those little empowering skills you’ll use again and again.
Let’s walk through it together!
What You’ll Need
- Your sewing pattern (or a traced copy)
- Scissors
- Tape or glue
- Ruler
- Pencil
Step 1: Decide how much length to remove
Before making any changes, decide exactly how much length you want to remove to your pattern piece.
This step is key when altering sewing patterns for height or body proportions.
You can do this by:
- Comparing the pattern measurements to your body
- Holding the pattern piece up against yourself
- Measuring a garment you already love the fit of
Taking the time to plan your pattern length adjustment helps you avoid over or under correcting.
Step 2: Find (or create) your shorten line
Many patterns include a “lengthen/shorten here” line and this is the safest place to adjust without affecting the overall shape.
If your pattern doesn’t have one:
- Draw a line perpendicular to the grainline
- Choose a spot away from darts, curves, or key design features
Think between bust and waist, or mid-thigh on a skirt for example.

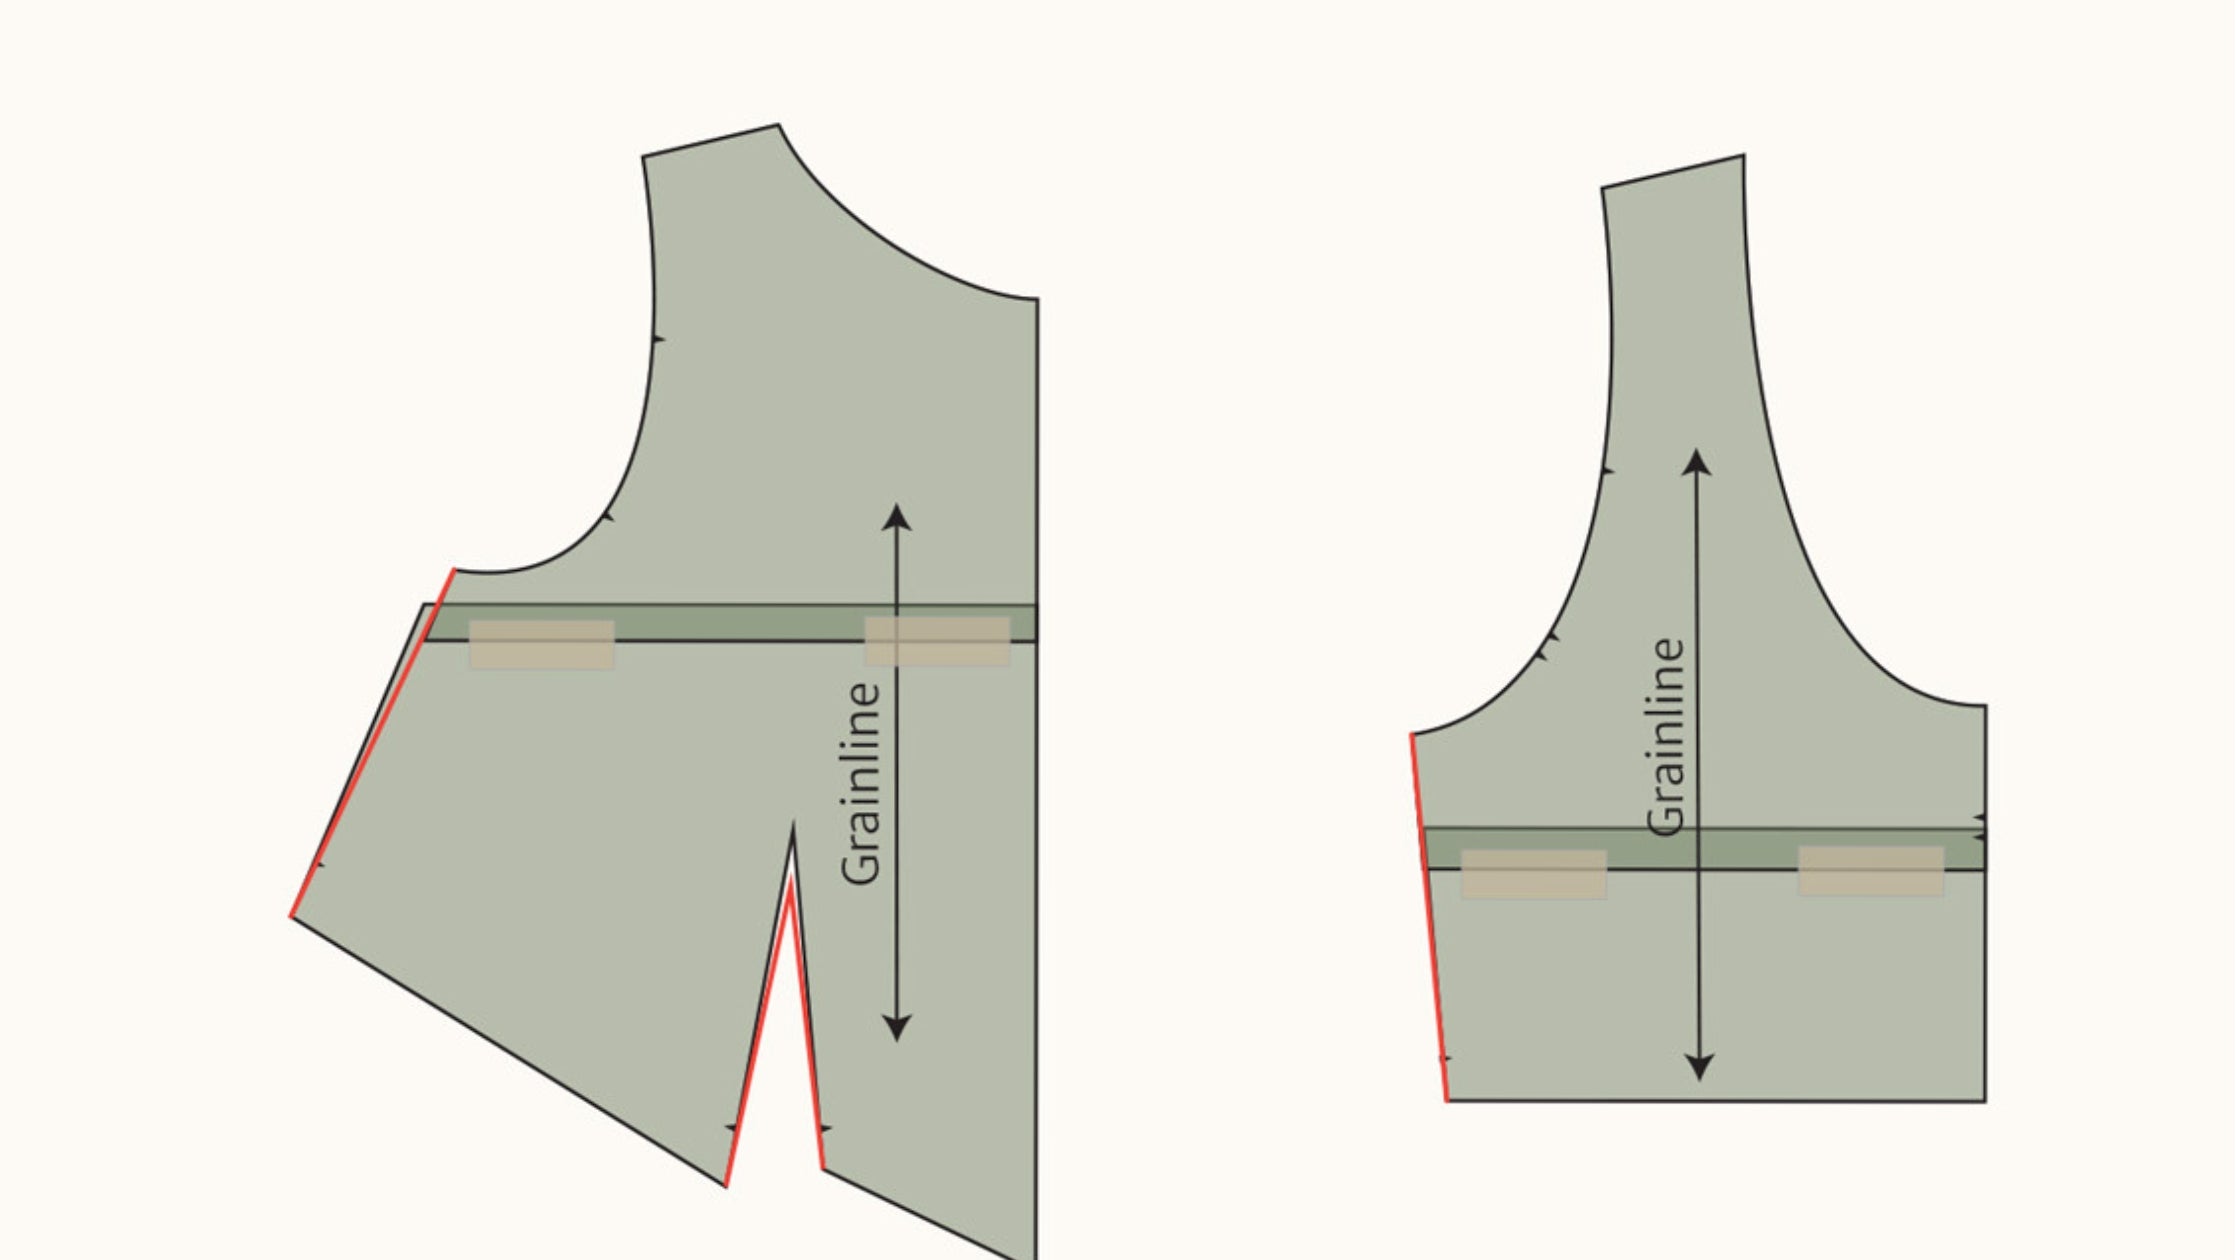
Step 3: Fold or cut out the excess length
Instead of cutting and spreading (like when lengthening), shortening is really simple:
- Fold the pattern along the shorten line
- The depth of the fold = the amount you want to remove
For example:
Want to shorten by 2cm? Fold out 2cm.
Keep everything aligned as you fold especially the grainline and CF/CB and tape into position.
If you do want to cut and overlap: overlap the pattern pieces by the desired amount and tape in position.
NOTE: As you bring the bottom half up on the front bodice piece, this also brings the bust dart point up. You may need to lower the bust dart point back down by the same amount. For example, if you shorten the pattern by 2.5cm (1”) you may need to lower the dart point by 2.5cm (1”).

Step 4: True your seams
Folding can create little steps along the seam lines, so now we need to smooth everything out.
- Redraw the side seams
- Blend any uneven edges
- Trim away excess paper if needed

Step 5: Repeat for matching pieces
When you shorten one pattern piece, you’ll usually need to adjust others too.
For example:
- Front and back bodice
- Sleeves
- Facings or linings
This keeps your seams aligned and is essential when adjusting sewing patterns for a consistent fit.
Final Thoughts
Shortening a pattern is one of those small adjustments that can completely transform how a garment feels on your body.
It’s not about changing yourself to fit the pattern. And once you stop doing that your handmade wardrobe begins to feel so much more like you ✨
Share:
How to make your own bias binding
How to lengthen a sewing pattern piece